
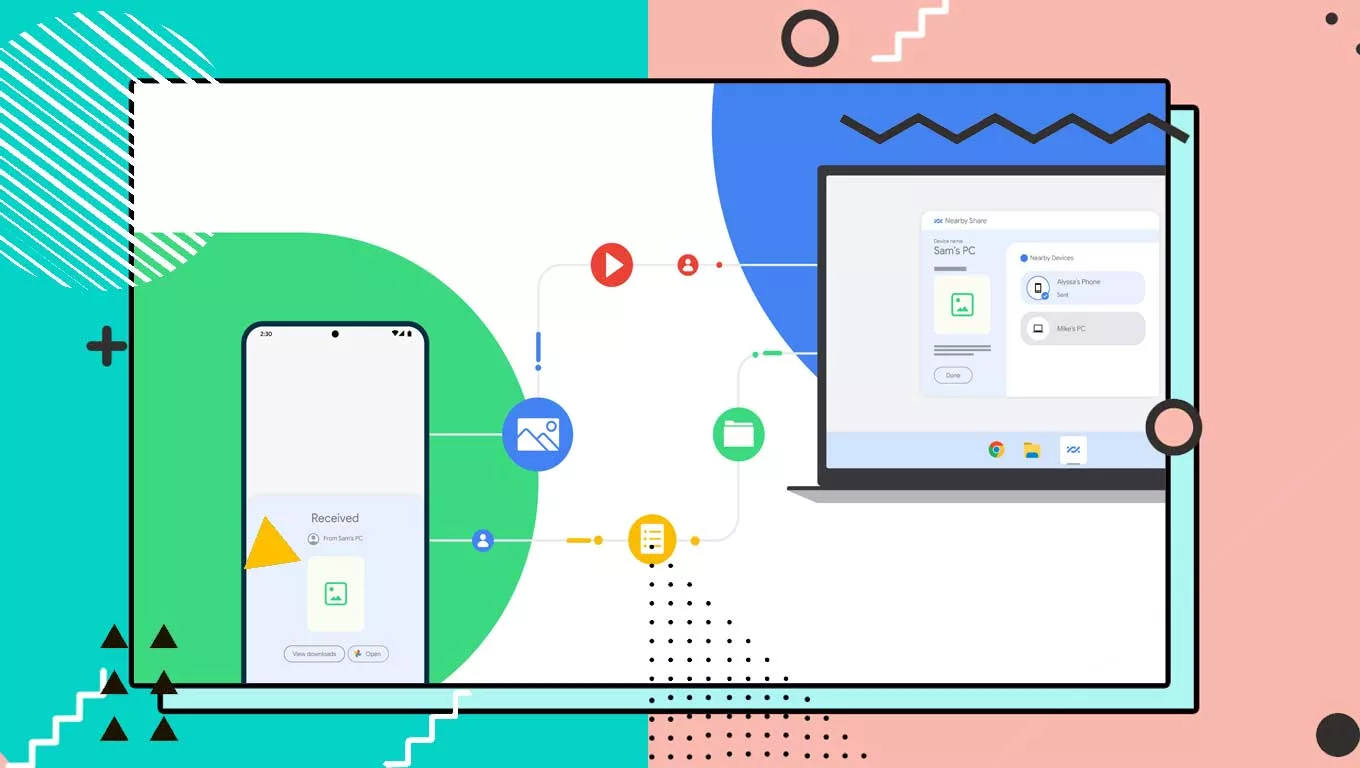
Google made an announcement at CES 2022 about their intention to introduce Nearby Share, a Windows version of AirDrop. Now, after a year has passed, the company has delivered on their promise by releasing the Nearby Share app for Windows. This exciting development allows seamless sharing of photos, videos, documents, files, and links between Android and Windows platforms. Currently, the app is in beta and supports Windows 10 and 11.
For individuals who frequently share files or links between an Android phone and a Windows PC, this news is highly beneficial. In this article, we will guide you through the process of utilizing Nearby Share to share files between these two platforms.
Since Nearby Share is presently in beta on Windows, there may be some occasional issues while using it. During our testing, we did not encounter any significant problems with the app, although it did crash a couple of times. If this minor inconvenience doesn’t deter you, here are the steps to install Nearby Share on your Windows PC:
- Visit the Nearby Share page and click on “Get Started.”
- Once the file is downloaded, navigate to the Downloads folder and double-click on the downloaded file to run the installer.
- Grant permission by clicking “Yes” on the User Account Control prompt to initiate the installation process.
- Wait for the installer to finish downloading and installing the software on your PC, and then click “Close” to complete the installation.
After successfully installing the Nearby Share app on your computer, you need to set it up before you can begin transferring or receiving files from an Android phone. Follow these steps to configure Nearby Share:
- Launch the Nearby Share app on your computer, known as “Nearby Share Beta” from Google.
- If you prefer to use it with your Google account, enter your Google account credentials to sign in. Alternatively, if you choose to proceed without your Google account, select “Use without an account.”
- You will then be prompted to assign a name to your PC. This name will be used to identify your PC to others on the network.
- If you’re using Nearby Share with a Google account, choose “Contacts” under the “Receiving” setting to limit visibility to individuals in your Google Contacts. Conversely, if you’re not signed in, set the device visibility to “Receive from everyone” to make your PC visible to all users on the network.
With Nearby Share set up on your Windows 10/11 PC, you can now commence sharing files with an Android phone. However, before proceeding, there are a few essential points to note:
- Bluetooth and Wi-Fi must be enabled on both your Android phone and Windows PC since Nearby Share utilizes these technologies for file transfer.
- If both devices are connected to a Wi-Fi network, ensure they are connected to the same network. Utilizing the 5GHz channel is recommended for faster transfer speeds.
- Notably, Nearby Share can transfer and receive files even without being connected to a Wi-Fi network. Simply ensure that Wi-Fi and Bluetooth are turned on, and Nearby Share will automatically choose the appropriate protocol.
To share a file or link from your Android phone to a Windows PC, ensure that your desktop is visible on the network. Follow these steps:
- Open the desired file, document, folder, link, or Wi-Fi password on your Android phone.
- Tap the Share button and select Nearby Share from the sharing options.
- After a few seconds, your Windows PC’s name will appear on the Nearby Share card. Tap on it.
- On your desktop, accept the sharing request by clicking the “Accept” button.
Depending on the file size and transfer medium, your file will now be transferred to the Windows PC. It will be automatically downloaded and saved to the Downloads folder on your computer. However, if you prefer, you can customize the save location. Follow these steps:
- Click on the settings icon in the Nearby Share app.
- Tap the “Change” button next to the “Save received files to” option.
- Select the desired directory where you want to save files in the future.
- Click “Change” to save the preferences.
Transferring files from your Windows PC to an Android phone is just as simple with Nearby Share. First, enable Nearby Share on your Android phone by following these steps:

- Open the Quick Settings panel on your Android phone.
- Tap on the Nearby Share tile.
- Toggle on the “Device visibility” option.
- Set the visibility to “Everyone” or “Contacts” based on your usage and sign-in status.
Now, you can proceed with the file transfer using the following steps:
- Select the files or folders you want to share on your Windows PC.
- Right-click on the selected item(s) and choose “Nearby Share.” Alternatively, you can open the Nearby Share app and drag and drop the items you wish to share.
- In the Nearby Devices list on the app, click on the name of your Android device.
- On your Android phone, tap “Accept” to initiate the file transfer.
- Once the file(s) are downloaded, you can find them in the Downloads directory on your phone.
That’s it! You have now successfully shared files between your Android phone and Windows PC using Nearby Share. Enjoy the convenience of quick and easy file sharing between the two platforms.
If you have any further questions or need additional assistance, feel free to ask.
