
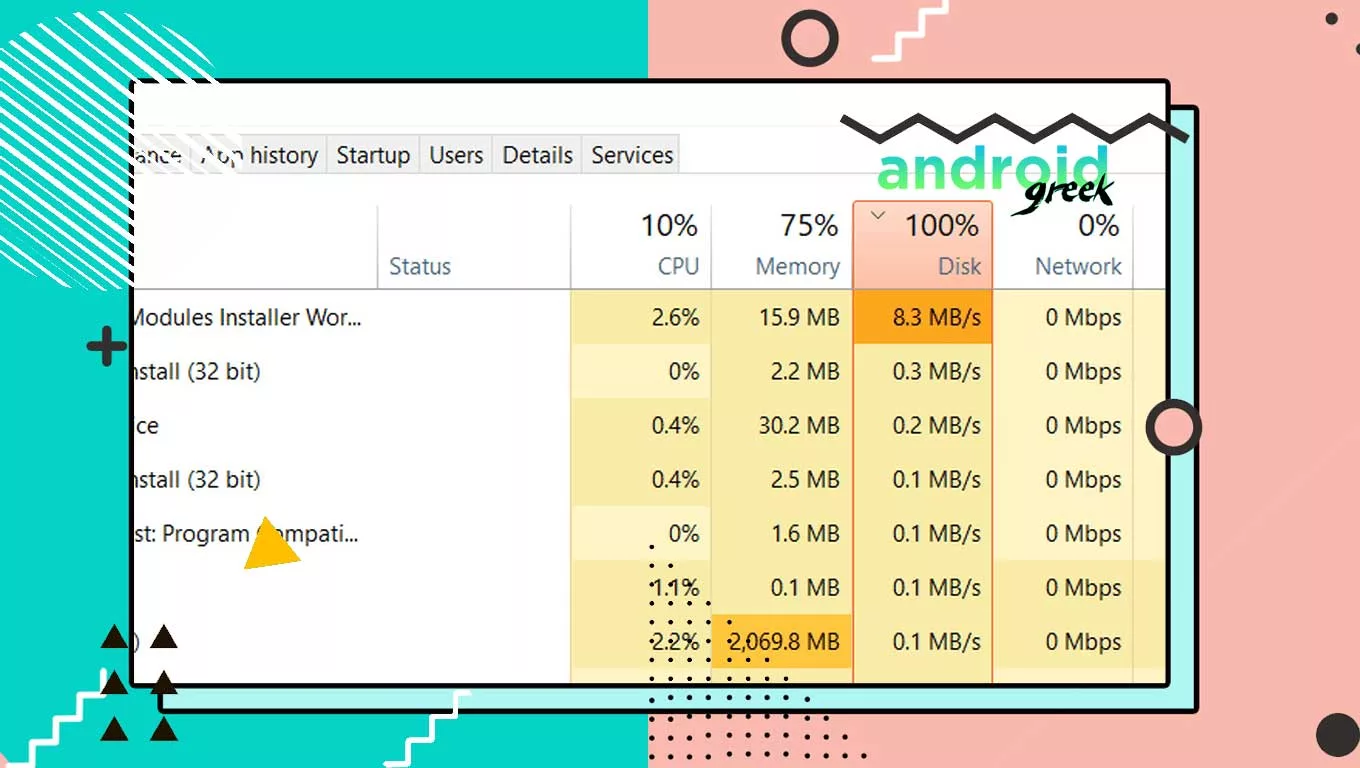
100% disk usage in Windows means that the hard drive is being fully utilized, and the system is unable to process additional requests. This can lead to slow performance and stability issues. To resolve the 100% disk usage issue, you can try the following steps:
Contents
Show
Here’s a step-by-step guide to resolve the 100% disk usage issue in Windows 10/11:
- Disable Windows Search:
- Press the Windows key + X and select “Windows PowerShell (Admin)” from the menu.
- In the PowerShell window, type “net.exe stop WindowsSearch” and press Enter.
- This will stop the Windows Search service, and you should notice an improvement in disk usage.
- Disable Superfetch:
- Press the Windows key + R to open the Run dialog box.
- Type “services.msc” in the Run dialog box and press Enter.
- In the Services Manager, scroll down and locate the “Superfetch” service.
- Right-click on it and select “Properties.”
- In the Properties window, change the Startup type to “Disabled.”
- Click on “Stop” and then on “OK.”
- Disable Background Intelligent Transfer Service (BITS):
- Follow the steps 1 and 2 to open the Services Manager.
- Locate the “Background Intelligent Transfer Service (BITS)” service.
- Right-click on it and select “Properties.”
- In the Properties window, change the Startup type to “Disabled.”
- Click on “Stop” and then on “OK.”
- Disable Skype:
- Close Skype completely.
- Right-click on the Taskbar and select “Task Manager.”
- In the Task Manager, locate the “Skype” process.
- Right-click on it and select “End task.”
- Run disk check:
- Press the Windows key + X and select “Windows PowerShell (Admin)” from the menu.
- In the PowerShell window, type “chkdsk.exe /f /r C:” and press Enter.
- Replace “C:” with the drive letter of your hard drive if it’s different.
- Wait for the disk check to complete, and restart your computer.
- Scan for malware:
- Press the Windows key + I to open the Settings app.
- Go to “Update & Security” and then to “Windows Security.”
- Click on “Virus & threat protection.”
- Click on “Scan now” to perform a full scan of your system.
- Update drivers:
- Press the Windows key + X and select “Device Manager” from the menu.
- Locate the device for which you want to update the driver.
- Right-click on it and select “Update driver.”
- Follow the on-screen instructions to complete the process.
- Reset virtual memory:
- Press the Windows key + X and select “System.”
- Click on “About.”
- Scroll down and click on “System info.”
- Under “System type,” make note of whether you have a 32-bit or 64-bit operating system.
- Press the Windows key + X and select “Control Panel.”
- In Control Panel, go to “System and Security” and then to “System.”
- Click on “Advanced system settings.”
- Go to the “Advanced” tab and click on “Settings” under “Performance.”
- Go to the “Advanced” tab and click on “Change” under “Virtual memory.”
- Uncheck the “Automatically manage paging file size for all drives” option.
- Select the drive for which you want to set the paging file size.
- Select “Custom size” and set the Initial size and Maximum size to the recommended values based on the amount of RAM you have.
- If you have
Hopefully, you have successfully Fix 100% disk usage in Task Manager in window 10/11. Thanks For being with us.
